BlueCuddly focused on buttons when she was creating this great treasury for the team!
Showing posts with label JoeiReedHats. Show all posts
Thursday, September 4, 2008
Thursday, August 7, 2008
HOW TO: Turning fabric scraps into a patchwork drawstring bag
This is a guest blog by Joei Reed of Joei Reed Hats for Etsy's NC Triangle Street Team blog
During any sewing project, one ends up with pieces of fabric that are too small to be useful, but big enough that it seems a shame to throw them away. And piled up together, the scraps add up to a pretty sizable amount of material. What to do with these wayward pieces? One thing that I like to do is create a patchwork drawstring purse or bag. It gives you a bag that coordinates with whatever you're making from the fabric, and it creates something striking from those seemingly "useless" little pieces.
The process is pretty simple. First collect your small pieces. Here's a set of scraps left over from a hat I covered recently. (You will probably find yourself saving all kinds of small pieces if you start making these sorts of projects):
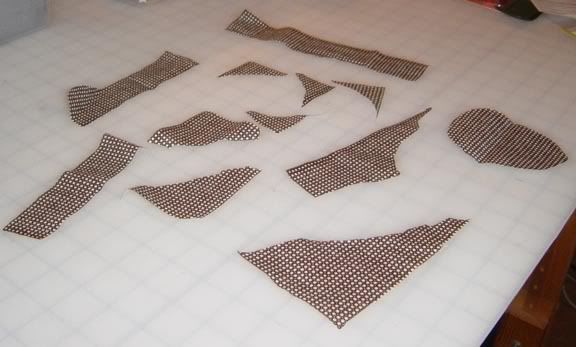
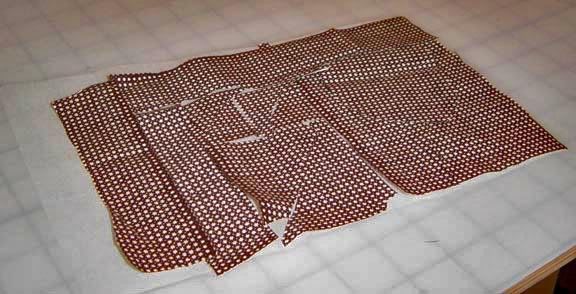
Figure out how to lay out your pieces so they fill in a rectangle/square, or even a circle. (The instructions here apply to square bags, but circular bags are not too dissimilar.) It's okay if your pieces overlap, just try not to leave gaps larger than about a quarter of an inch.
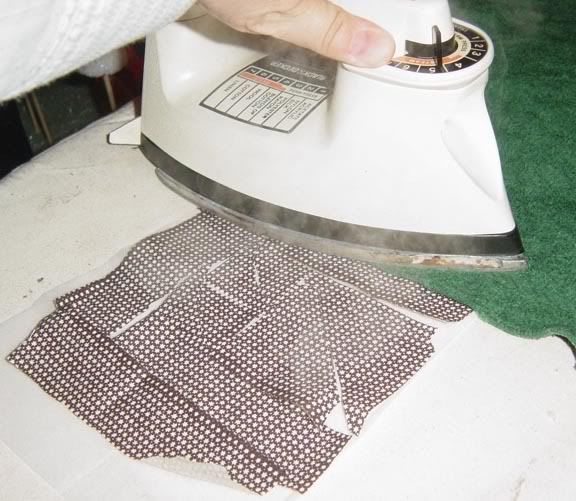
Cut a piece of fusible interfacing the side of your pieced-together shape, and place your fabric on it, with the fusible side towards the fabric. Fuse it to your fabric following the instructions that come with the interfacing. This usually involves an iron on a wool setting and a damp presscloth.
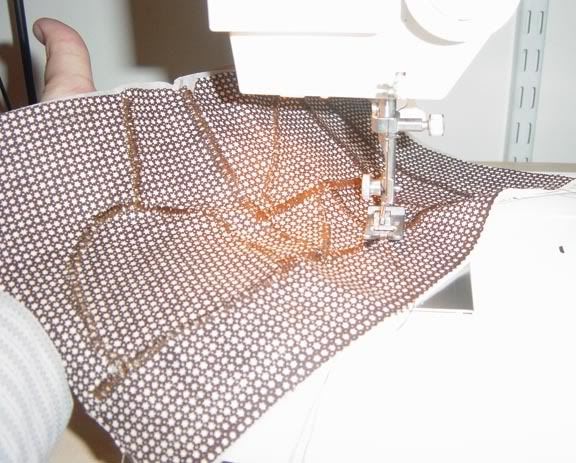
Your fabric will now be stuck down to the interfacing, so your little pieces will stay in place. Next set your sewing machine to its widest zigzag stitch setting, and a short stitch length, usually around 1. Zigzag stitch over all of your edges of all of the pieces. It's okay to go over some edges more than once if you need to, in order to not have to start new lines of stitching. You can use a coordinating thread color, as I did here, or you can use a contrasting one to play up your patchworking.

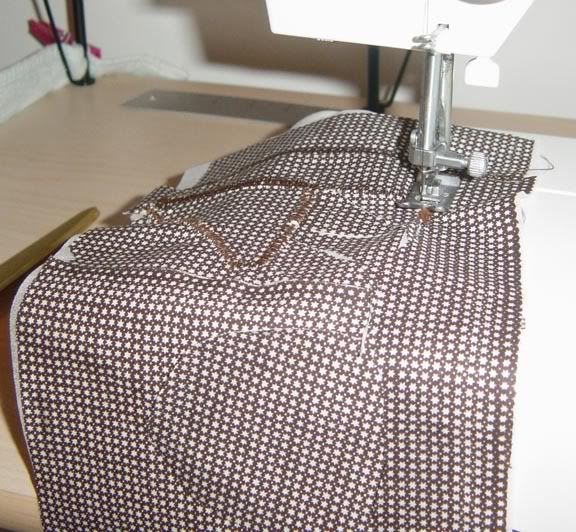
Once you have finished your zigzag stitching over the surface of the fabric, use the same stitch to overcast the entire edge of the piece. This is done by zigzag stitching off of the edge of the fabric, so it locks the edge in stitching and it won't fray.

You'll probably want to press your finished piece.

So here's what the finished piece looks like.

At this point you can back the piece with another piece of fabric the same size (another patchwork piece, if you like) or you can fold the patchwork piece in half to make the bag. In this case I was making a smaller bag so I folded it. So to figure out the size of your final bag, fold it in half and fold over about an inch or so of fabric at the top (depending on the size of the drawstring you will use).

To make a hole for the drawstring on the folded side, mark the folded location with pins and make a small buttonhole that is slightly shorter than your casing length.

(You can skip the buttonhole step if you are not making a folded bag. Just do both sides as indicated below.)
Fold your bag back in half, inside out, and pin the open sides together, stopping just a little bit above where the top foldover (which will make the drawstring casing) will attach to the rest of the bag.

Sew on the two open sides, again stopping where you pinned at the top.

Fold down the casing and stitch, being careful to sew only through one layer of fabric! If you sew through both sides, you'll sew your bag shut!

Turn your bag right side out and press, and then turn the seam allowance to the outside just at the top on the stitched edge to create the opening for the casing. You may need to stitch it a couple of times to hold it in place.

To create the drawstring, cut two lengths of a ribbon or cord to about three times the width of your bag, and attach one to a safety pin.

Thread it through the casing opening on one side, all the way around the top of the bag, and back out the other opening on the same side that you started.

Repeat for the other side of the casing.

Knot the ends of your cords, and your bag is finished!

Here are some other patchwork bags I've created over the years. In one I made an effort to line up the pieces so they had the same pattern as the original material. In other projects the stitching becomes part of the design.

Once you have your piece patchworked, you can of course use it for other things than drawstring bags. You can create other purse layouts, or if you have larger patchwork pieces, they can be made into a shawl, for instance.
I hope this easy and quick project will give you something fun and rewarding to do with your leftover pieces!
--Many thanks to Joei for sharing this project how-to with us!
During any sewing project, one ends up with pieces of fabric that are too small to be useful, but big enough that it seems a shame to throw them away. And piled up together, the scraps add up to a pretty sizable amount of material. What to do with these wayward pieces? One thing that I like to do is create a patchwork drawstring purse or bag. It gives you a bag that coordinates with whatever you're making from the fabric, and it creates something striking from those seemingly "useless" little pieces.
The process is pretty simple. First collect your small pieces. Here's a set of scraps left over from a hat I covered recently. (You will probably find yourself saving all kinds of small pieces if you start making these sorts of projects):

Figure out how to lay out your pieces so they fill in a rectangle/square, or even a circle. (The instructions here apply to square bags, but circular bags are not too dissimilar.) It's okay if your pieces overlap, just try not to leave gaps larger than about a quarter of an inch.

Cut a piece of fusible interfacing the side of your pieced-together shape, and place your fabric on it, with the fusible side towards the fabric. Fuse it to your fabric following the instructions that come with the interfacing. This usually involves an iron on a wool setting and a damp presscloth.

Your fabric will now be stuck down to the interfacing, so your little pieces will stay in place. Next set your sewing machine to its widest zigzag stitch setting, and a short stitch length, usually around 1. Zigzag stitch over all of your edges of all of the pieces. It's okay to go over some edges more than once if you need to, in order to not have to start new lines of stitching. You can use a coordinating thread color, as I did here, or you can use a contrasting one to play up your patchworking.
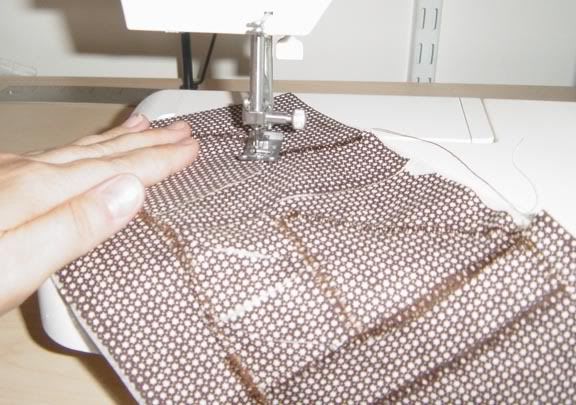
Once you have finished your zigzag stitching over the surface of the fabric, use the same stitch to overcast the entire edge of the piece. This is done by zigzag stitching off of the edge of the fabric, so it locks the edge in stitching and it won't fray.
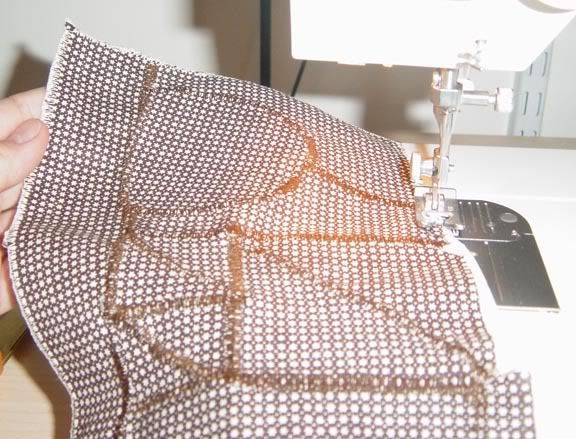
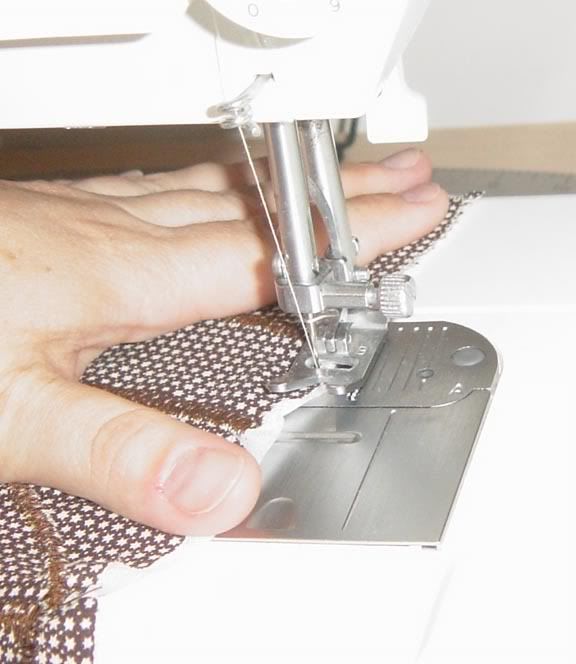
You'll probably want to press your finished piece.

So here's what the finished piece looks like.
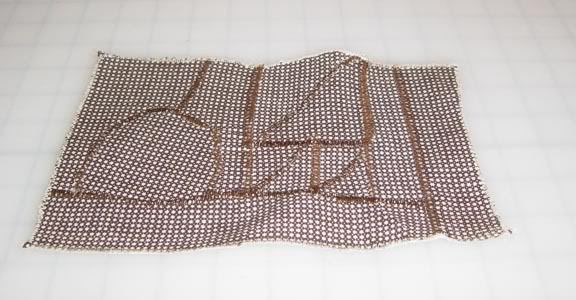
At this point you can back the piece with another piece of fabric the same size (another patchwork piece, if you like) or you can fold the patchwork piece in half to make the bag. In this case I was making a smaller bag so I folded it. So to figure out the size of your final bag, fold it in half and fold over about an inch or so of fabric at the top (depending on the size of the drawstring you will use).
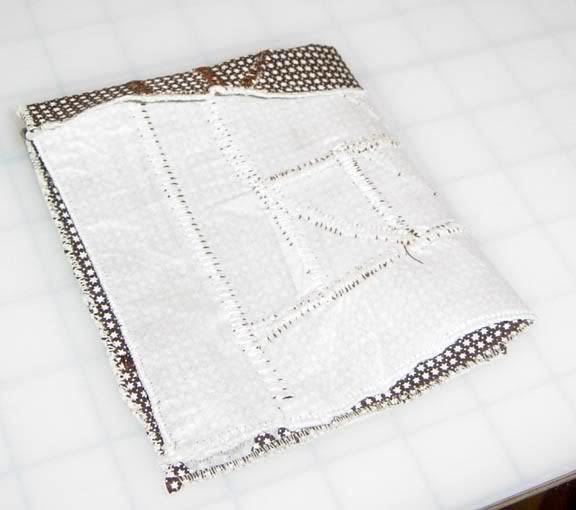
To make a hole for the drawstring on the folded side, mark the folded location with pins and make a small buttonhole that is slightly shorter than your casing length.
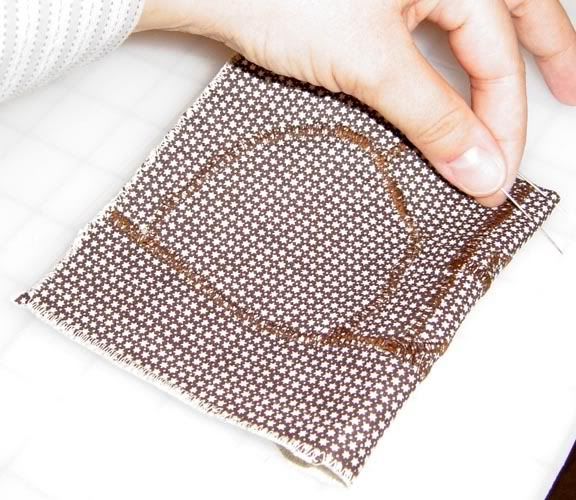
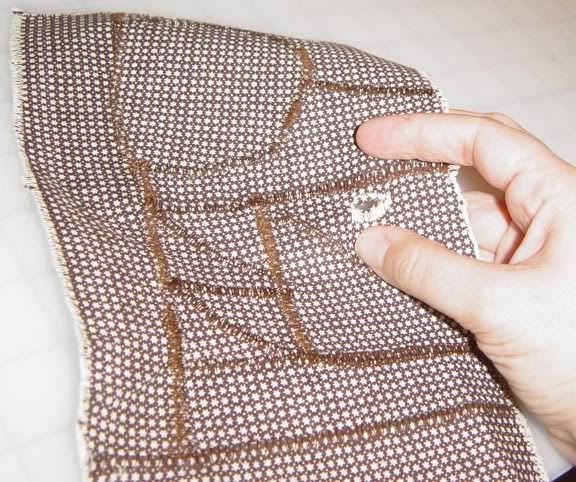
(You can skip the buttonhole step if you are not making a folded bag. Just do both sides as indicated below.)
Fold your bag back in half, inside out, and pin the open sides together, stopping just a little bit above where the top foldover (which will make the drawstring casing) will attach to the rest of the bag.
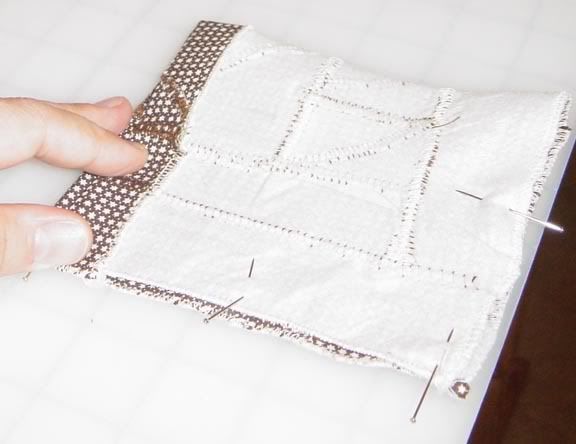
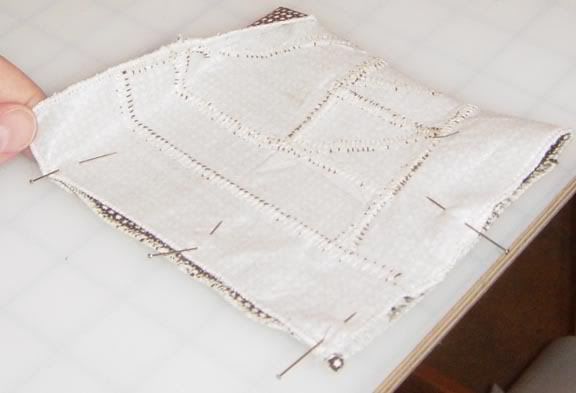
Sew on the two open sides, again stopping where you pinned at the top.
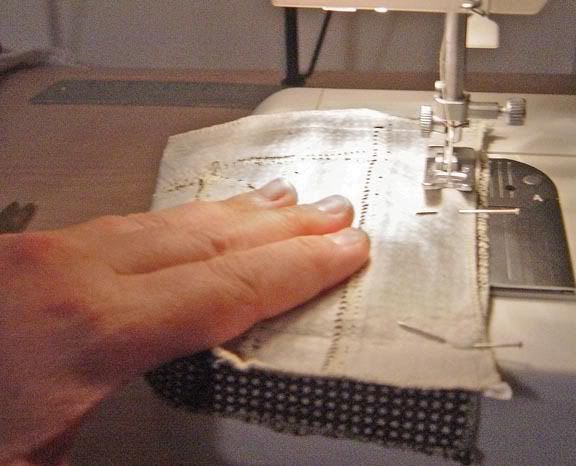
Fold down the casing and stitch, being careful to sew only through one layer of fabric! If you sew through both sides, you'll sew your bag shut!
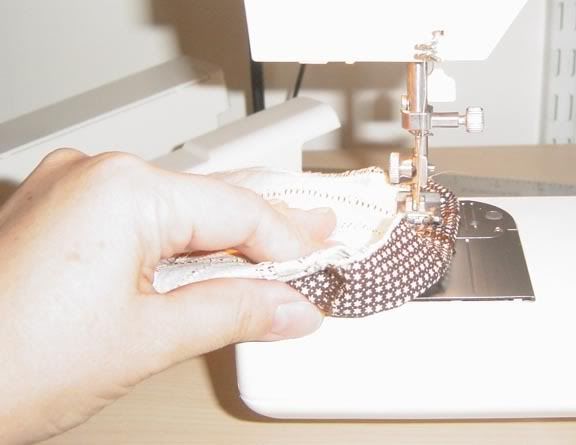
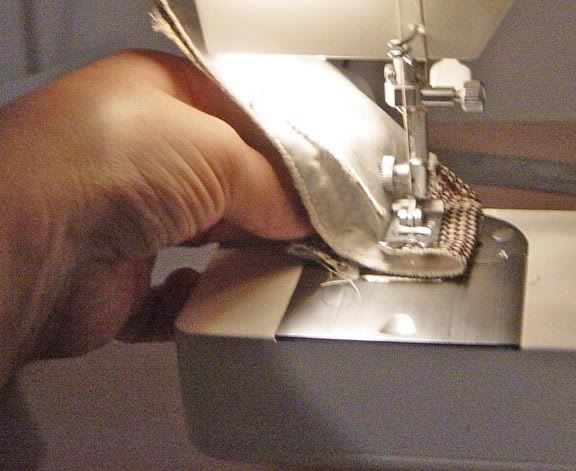
Turn your bag right side out and press, and then turn the seam allowance to the outside just at the top on the stitched edge to create the opening for the casing. You may need to stitch it a couple of times to hold it in place.
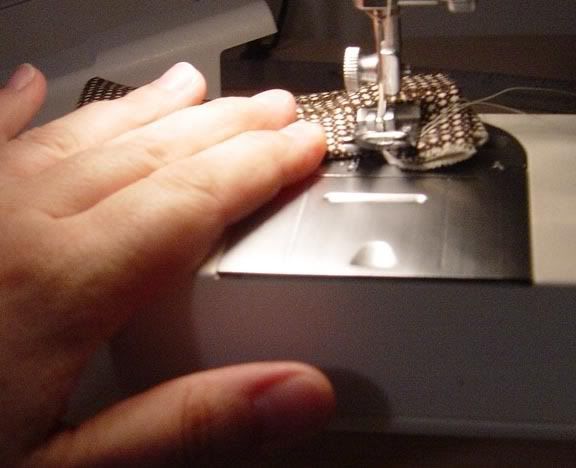
To create the drawstring, cut two lengths of a ribbon or cord to about three times the width of your bag, and attach one to a safety pin.
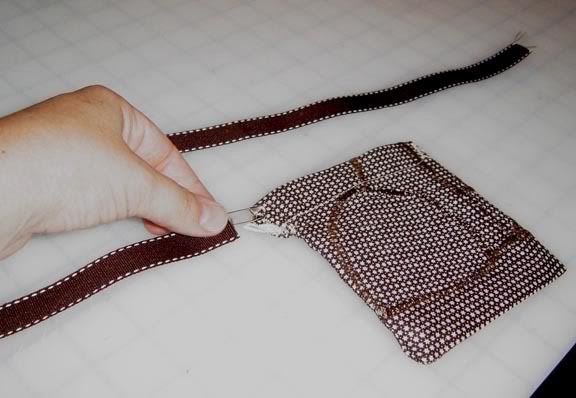
Thread it through the casing opening on one side, all the way around the top of the bag, and back out the other opening on the same side that you started.
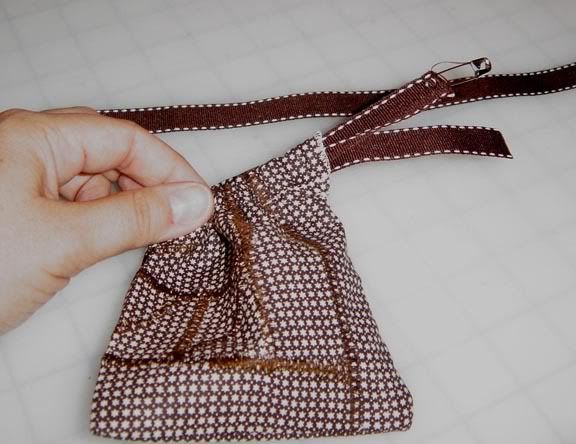
Repeat for the other side of the casing.
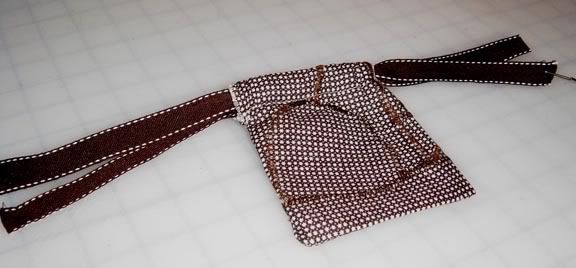
Knot the ends of your cords, and your bag is finished!
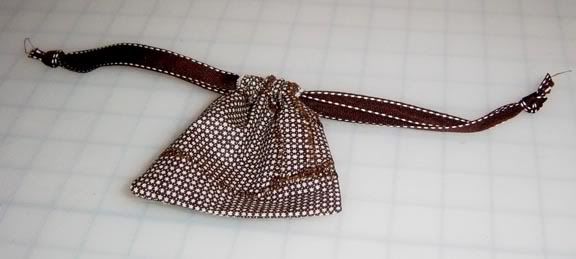
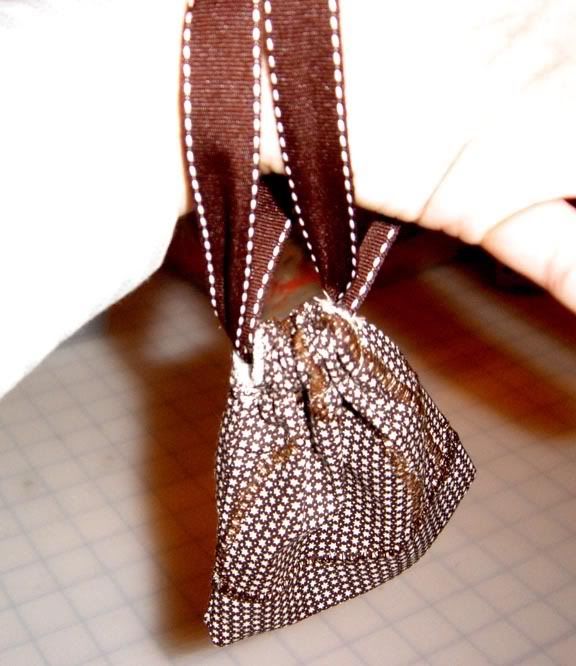
Here are some other patchwork bags I've created over the years. In one I made an effort to line up the pieces so they had the same pattern as the original material. In other projects the stitching becomes part of the design.

Once you have your piece patchworked, you can of course use it for other things than drawstring bags. You can create other purse layouts, or if you have larger patchwork pieces, they can be made into a shawl, for instance.
I hope this easy and quick project will give you something fun and rewarding to do with your leftover pieces!
--Many thanks to Joei for sharing this project how-to with us!
Labels:
Etsy,
How To,
JoeiReedHats,
NCTriangle
Friday, July 11, 2008
Where We Create: Behind the Scenes of NC Triangle Etsiers
Welcome to behind the scenes of NC Etsier JoeiReed Hats

How would you describe the space in which you create?
I've taken over most of one of our spare rooms. It doubles as an office when I'm not sewing, and my husband also has his computer in there because he likes to hang out and play computer games while I'm sewing, so we can be in the same area. I've had a dedicated sewing room in this fashion for the last decade and I could never go back to having my sewing things shoved into a corner of another room! It's so much harder to find the time to create when you have to take everything out and set it up. This way, my sewing table and my sewing machine are always ready to go. I have a large cutting table of adjustable height, covered with self-healing mat so I can use a rotary cutter on it, and a lamp clamped to it so I always have good light. I have a separate shelf with my sewing machine set up on it. Most often, I also have my ironing board set up on the other side of the room. I have two dressforms, one my size and one smaller. I have several hat stands set up for finished hats and ones in progress. I have two full-length mirrors. I also have a corner set up covered with black fabric and a stand with a mannequin head on it that I use to photograph my hats to send to customers or post in my store. The great thing about taking over a room is I get a whole closet in which to store my costumes and hats and wigs. And of course, I usually have music playing on my computer while I work.
What is your favorite thing about your space? My cutting table. It's at a great height to stand and cut fabric. I can move it out so I can walk entirely around it. And I had it custom covered with self-healing mat so I can cut on it with a rotary cutter without damaging the table.
How do you keep your space organized? My late stepfather was very good at interior design, and he was the first to suggest that I put a shelf way up near the ceiling, all the way around the room, to get all my supplies off the floor. It's a really great idea, as it really opens up the floor space. It means I have to use a stepstool to reach everything, but it's a small concession. I am big into bins - I have about 20 plastic bins with lids. About a dozen are dedicated to fabric, one color per bin. I also have two for patterns, one for feathers, two for ribbon and trim, several smaller ones for fabric flowers, and several with ongoing projects or miscellaneous notions.
Do you have inspiration pieces in your space? If so, what are they? I try to keep my fabric "filed" but I often have several pieces out that I'm dying to use. I also have some patterns out that I really want to use. But for my hats, most of my inspiration comes from my materials. If I get any time when I'm not making custom orders, I'm pulling out a color of veiling or feather I haven't had the chance to use yet.
Is there something else you'd like to share about your space? When I'm making hats, I use my cutting table as a work space, and it's usually overflowing with bins of feathers, veiling and ribbons. I am usually pulling out different colors that are buried down in the bins, so they get disorganized very quickly. The only way I completely clean up is when I'm switching to a sewing project, so I have to clear the table for cutting fabric. It lasts until the next time I have to start making hats!
Check Joei out at her Etsy store, see more pictures on photobucket and read her blog about hat care and tips.

How would you describe the space in which you create?
I've taken over most of one of our spare rooms. It doubles as an office when I'm not sewing, and my husband also has his computer in there because he likes to hang out and play computer games while I'm sewing, so we can be in the same area. I've had a dedicated sewing room in this fashion for the last decade and I could never go back to having my sewing things shoved into a corner of another room! It's so much harder to find the time to create when you have to take everything out and set it up. This way, my sewing table and my sewing machine are always ready to go. I have a large cutting table of adjustable height, covered with self-healing mat so I can use a rotary cutter on it, and a lamp clamped to it so I always have good light. I have a separate shelf with my sewing machine set up on it. Most often, I also have my ironing board set up on the other side of the room. I have two dressforms, one my size and one smaller. I have several hat stands set up for finished hats and ones in progress. I have two full-length mirrors. I also have a corner set up covered with black fabric and a stand with a mannequin head on it that I use to photograph my hats to send to customers or post in my store. The great thing about taking over a room is I get a whole closet in which to store my costumes and hats and wigs. And of course, I usually have music playing on my computer while I work.
What is your favorite thing about your space? My cutting table. It's at a great height to stand and cut fabric. I can move it out so I can walk entirely around it. And I had it custom covered with self-healing mat so I can cut on it with a rotary cutter without damaging the table.
How do you keep your space organized? My late stepfather was very good at interior design, and he was the first to suggest that I put a shelf way up near the ceiling, all the way around the room, to get all my supplies off the floor. It's a really great idea, as it really opens up the floor space. It means I have to use a stepstool to reach everything, but it's a small concession. I am big into bins - I have about 20 plastic bins with lids. About a dozen are dedicated to fabric, one color per bin. I also have two for patterns, one for feathers, two for ribbon and trim, several smaller ones for fabric flowers, and several with ongoing projects or miscellaneous notions.

Do you have inspiration pieces in your space? If so, what are they? I try to keep my fabric "filed" but I often have several pieces out that I'm dying to use. I also have some patterns out that I really want to use. But for my hats, most of my inspiration comes from my materials. If I get any time when I'm not making custom orders, I'm pulling out a color of veiling or feather I haven't had the chance to use yet.
Is there something else you'd like to share about your space? When I'm making hats, I use my cutting table as a work space, and it's usually overflowing with bins of feathers, veiling and ribbons. I am usually pulling out different colors that are buried down in the bins, so they get disorganized very quickly. The only way I completely clean up is when I'm switching to a sewing project, so I have to clear the table for cutting fabric. It lasts until the next time I have to start making hats!
Check Joei out at her Etsy store, see more pictures on photobucket and read her blog about hat care and tips.
Labels:
craftroom,
inspiration,
JoeiReedHats,
space,
Where We Create
Sunday, June 29, 2008
Subscribe to:
Posts (Atom)